
Staging sites are a key feature of Simplenet’s hosting control panel. They allow you to test changes, try new designs, and fix issues without impacting your live website.
This guide will show you how to create, manage, and deploy staging sites.
1. Log in to Your Client Area
Go to Simplenet.io and log in to your client account. Then, navigate to your Managed WordPress Hosting service and click Login to access the hosting control panel.
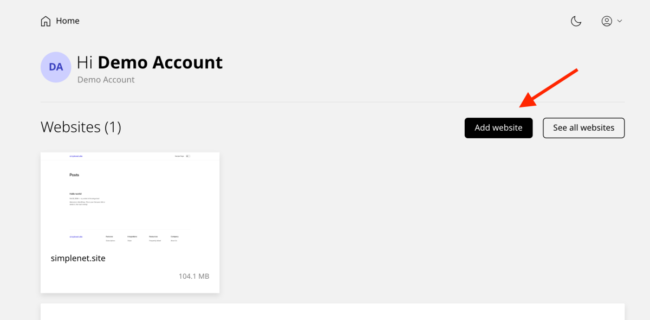
2. Create a Staging Site
In the hosting control panel, click on Add Website.
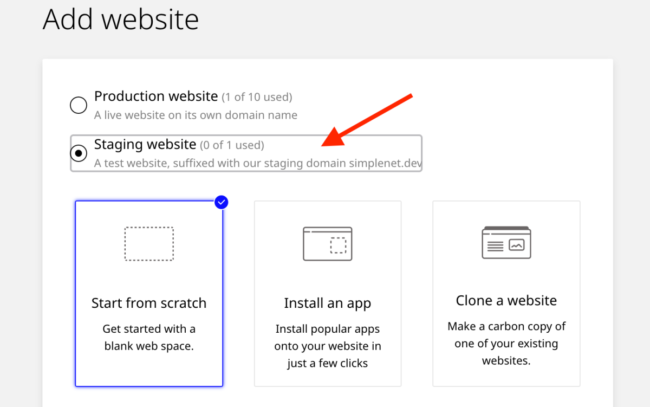
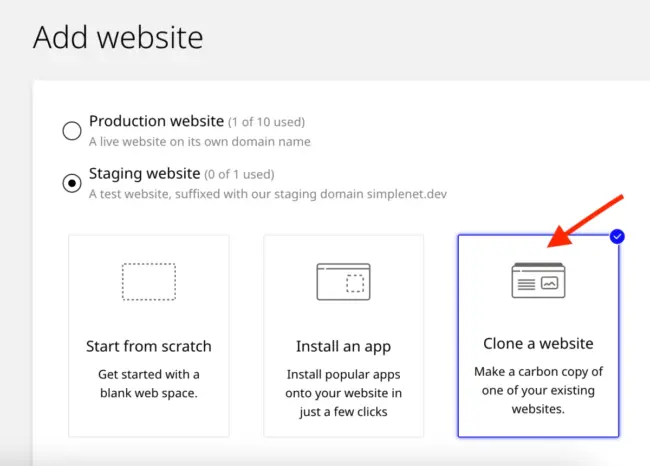
Choose Staging Website. Select one of the following options:
- Start from scratch: Create a blank staging site.
- Install an app: Set up a new WordPress instance.
- Clone an existing website: Duplicate your live website to the staging environment.
Scenario 1: Building a new website for a client
For exemple, if you want to create a new website for you or for a client and you want to build it first on the staging environment before going live, follow the next steps.
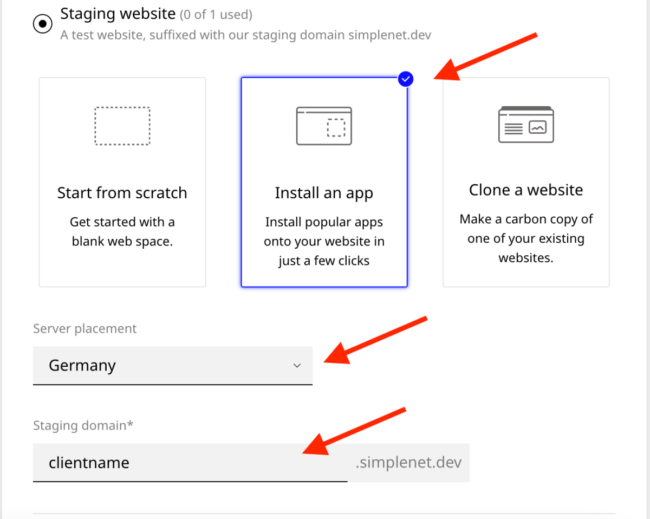
As shown in the screenshot below, select Install an app, choose the server location from the Server placement dropdown, and fill in your desired website name.
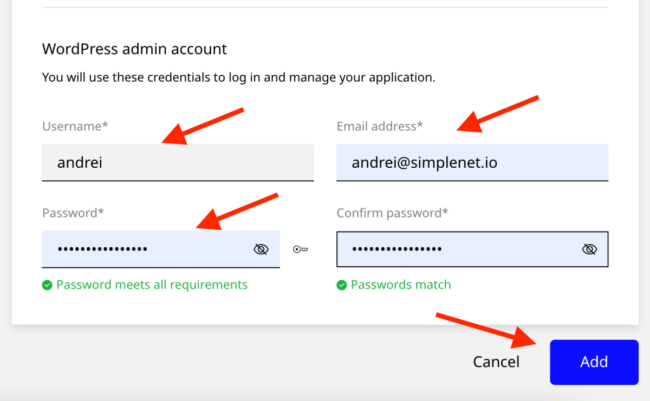
Scroll down and enter the desired WordPress admin account details: your username, your email, and your password, then click Add to create the staging website.
It might take a few minutes for a free Let’s Encrypt SSL certificate to be issued automatically.
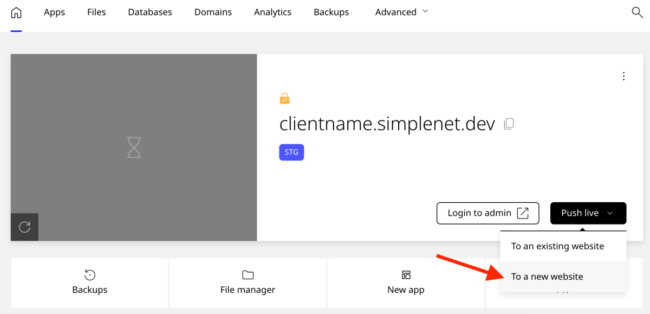
You can work on the website, share the staging site URL with your client to get feedback, and once the website is ready, click Push Live and choose Push Live to a new website.
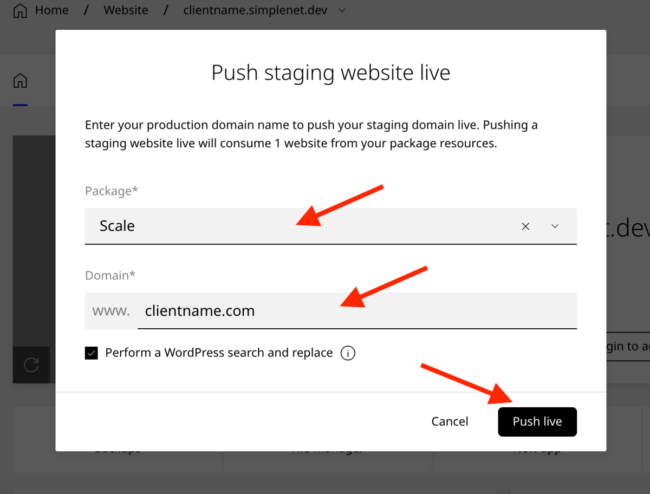
In the modal window that appears, select the hosting package, enter the live domain (e.g., clientname.com), and keep the Perform a WordPress search and replace option checked to update domain URL references.
Click Push live to finish the operations.
The new live site will be created shortly, and you can manage it from the control panel. If necessary, we can also help you transfer ownership to the client’s hosting plan.
Scenario 2: Updating an existing website
If you want to update an existing website for you or a client and do it on the staging environment before making the updates on the live version, please follow the next steps.
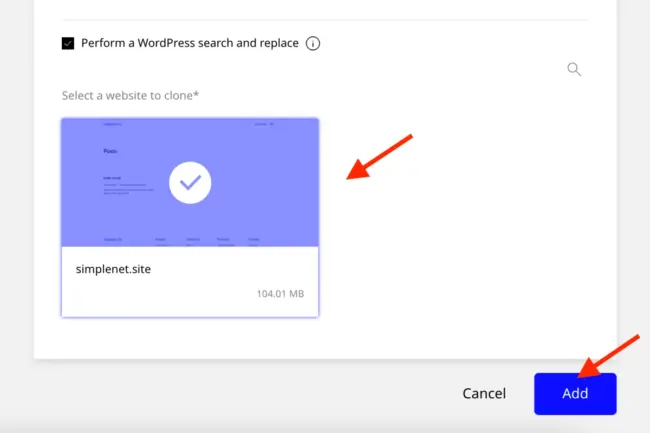
As shown in the screenshot below, select the third option: Clone a website.
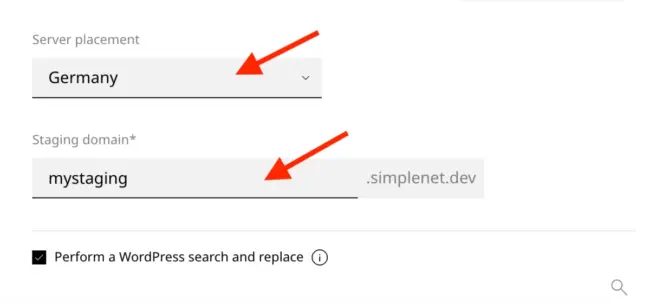
Enter the following details: the server group from the Server Placement dropdown section and the desired name for the staging domain. Keep the Perform a WordPress search and replace option checked.
The next step is to select the live website to clone, then click Add to create the staging site.
Depending on the website’s size, this process may take some time.
Once done, the clone site will receive an automatic free Let’s Encrypt SSL certificate in a few minutes.
Next, you can log in to the staging site’s admin panel to perform updates or changes. Once satisfied with the changes, click Push to Live and choose To an existing website:
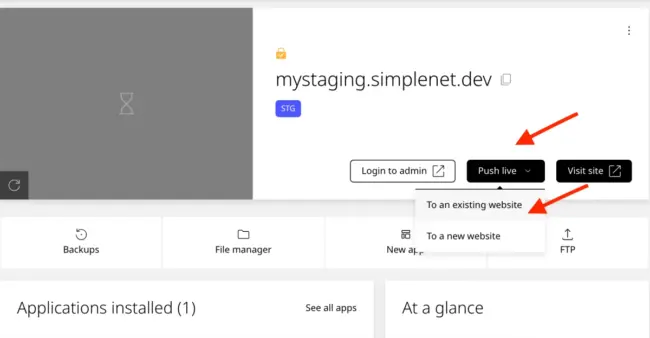
In the new window that appears, you need to select the live website from the Destination website section.
You can configure settings such as excluding files, syncing PHP versions, or performing a search and replace. Then, click Push Live to deploy the changes.
Note: The live website will be overwritten, so ensure no critical changes have been made to the live site during this process.

Key Features of Staging Sites
- SSL Support: At Simplenet, a free Let’s Encrypt SSL certificate is automatically issued.
- Search and Replace: Automatically updates domain references when pushing changes live.
- Customizable Options: During deployment, control file inclusion, PHP settings, and other parameters.
FAQ
How often should I use a staging site?
You should use a staging site whenever you plan to make significant changes, such as updating plugins, themes, or core WordPress files.
Can I revert changes if something goes wrong?
Yes, Simplenet’s staging site feature allows you to roll back changes if necessary. Please ensure you maintain proper backups.
How long does it take to create a staging site?
Creating a staging site takes only a few minutes. It depends on the size of the website.
Conclusion
Simplenet’s staging site feature offers a flexible and secure method for managing website updates and development. If you’re building a new site or updating one, this tool helps you move from testing to deployment smoothly.
If you need more help, please contact our support team.
Leave a Reply