
Redis Object Cache boosts your WordPress website’s speed by reducing database queries. It helps content load faster and improves overall performance.
Here is a video tutorial on enabling Redis Object Cache for your website from Simplenet’s hosting panel.
Steps to Enable Redis Object Cache in the Simplenet Hosting Panel
To enable Redis Object Cache, log into your client area.
Log in to your client area.
Visit simplenet.io and click Log in.
After signing in, navigate to the Services section. Select your WordPress hosting plan and open the hosting panel.
Enable Redis in the Hosting Panel
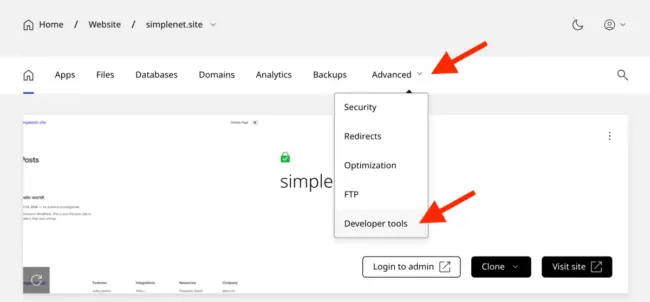
Inside the panel, go to Advanced –> Developer Tools.
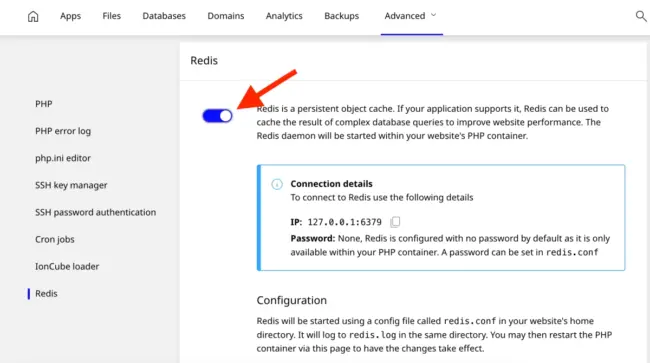
Open the Redis section and turn it on. Redis enables caching at the server level, making data retrieval more efficient.
Configure Redis in WordPress
The next step is to log in to your WordPress dashboard. Open the Plugins menu, search for Redis Object Cache by Till Krüss, and install it. Once installed, activate the plugin.
Enable Object Cache
Check the Redis status in the plugin settings.
If Redis is reachable and file permissions are correct, enable object caching.
If the status says Not Enabled, click the Enable Object Cache button. This final step activates Redis caching for your website.
Once active, Redis runs automatically. Monitor its performance in the plugin dashboard. If needed, clear the cache using the Flush Cache option. To temporarily turn off caching, use the Disable Cache button.
With Redis Object Cache enabled, dynamic pages on your website, such as the admin area, will load faster.
If you need any assistance, our support team is available to help. Contact us through your client area for further guidance.
Leave a Reply