Funny enough, although I’ve been working with WordPress since 2009 I never needed to translate my websites into multiple languages.
But I always got questions from clients to recommend a way to translate their sites. So I’ve tested the likes of WPML, Babble, qTranslate or Polylang but was never quite sold on any of them.
In 2017 I saw a demo of TranslatePress at WordCamp Bucharest and I was immediately drawn to the ease of use. I knew the team behind the plugin from WordCamp Romania 2014. They’re cool guys, and that gave me the nudge to test more in depth.
TranslatePress is a WordPress plugin that lets you translate your site, or parts of it, easily – directly from the front-end. It works similarly to a visual page editor in that regard, I felt like working in the WordPress Customizer.
Since more and more sites are catering to an international audience, you can’t afford
Put simply – if you’re translating your site, then you should, by all means, be using TranslatePress.
Install and setup TranslatePress
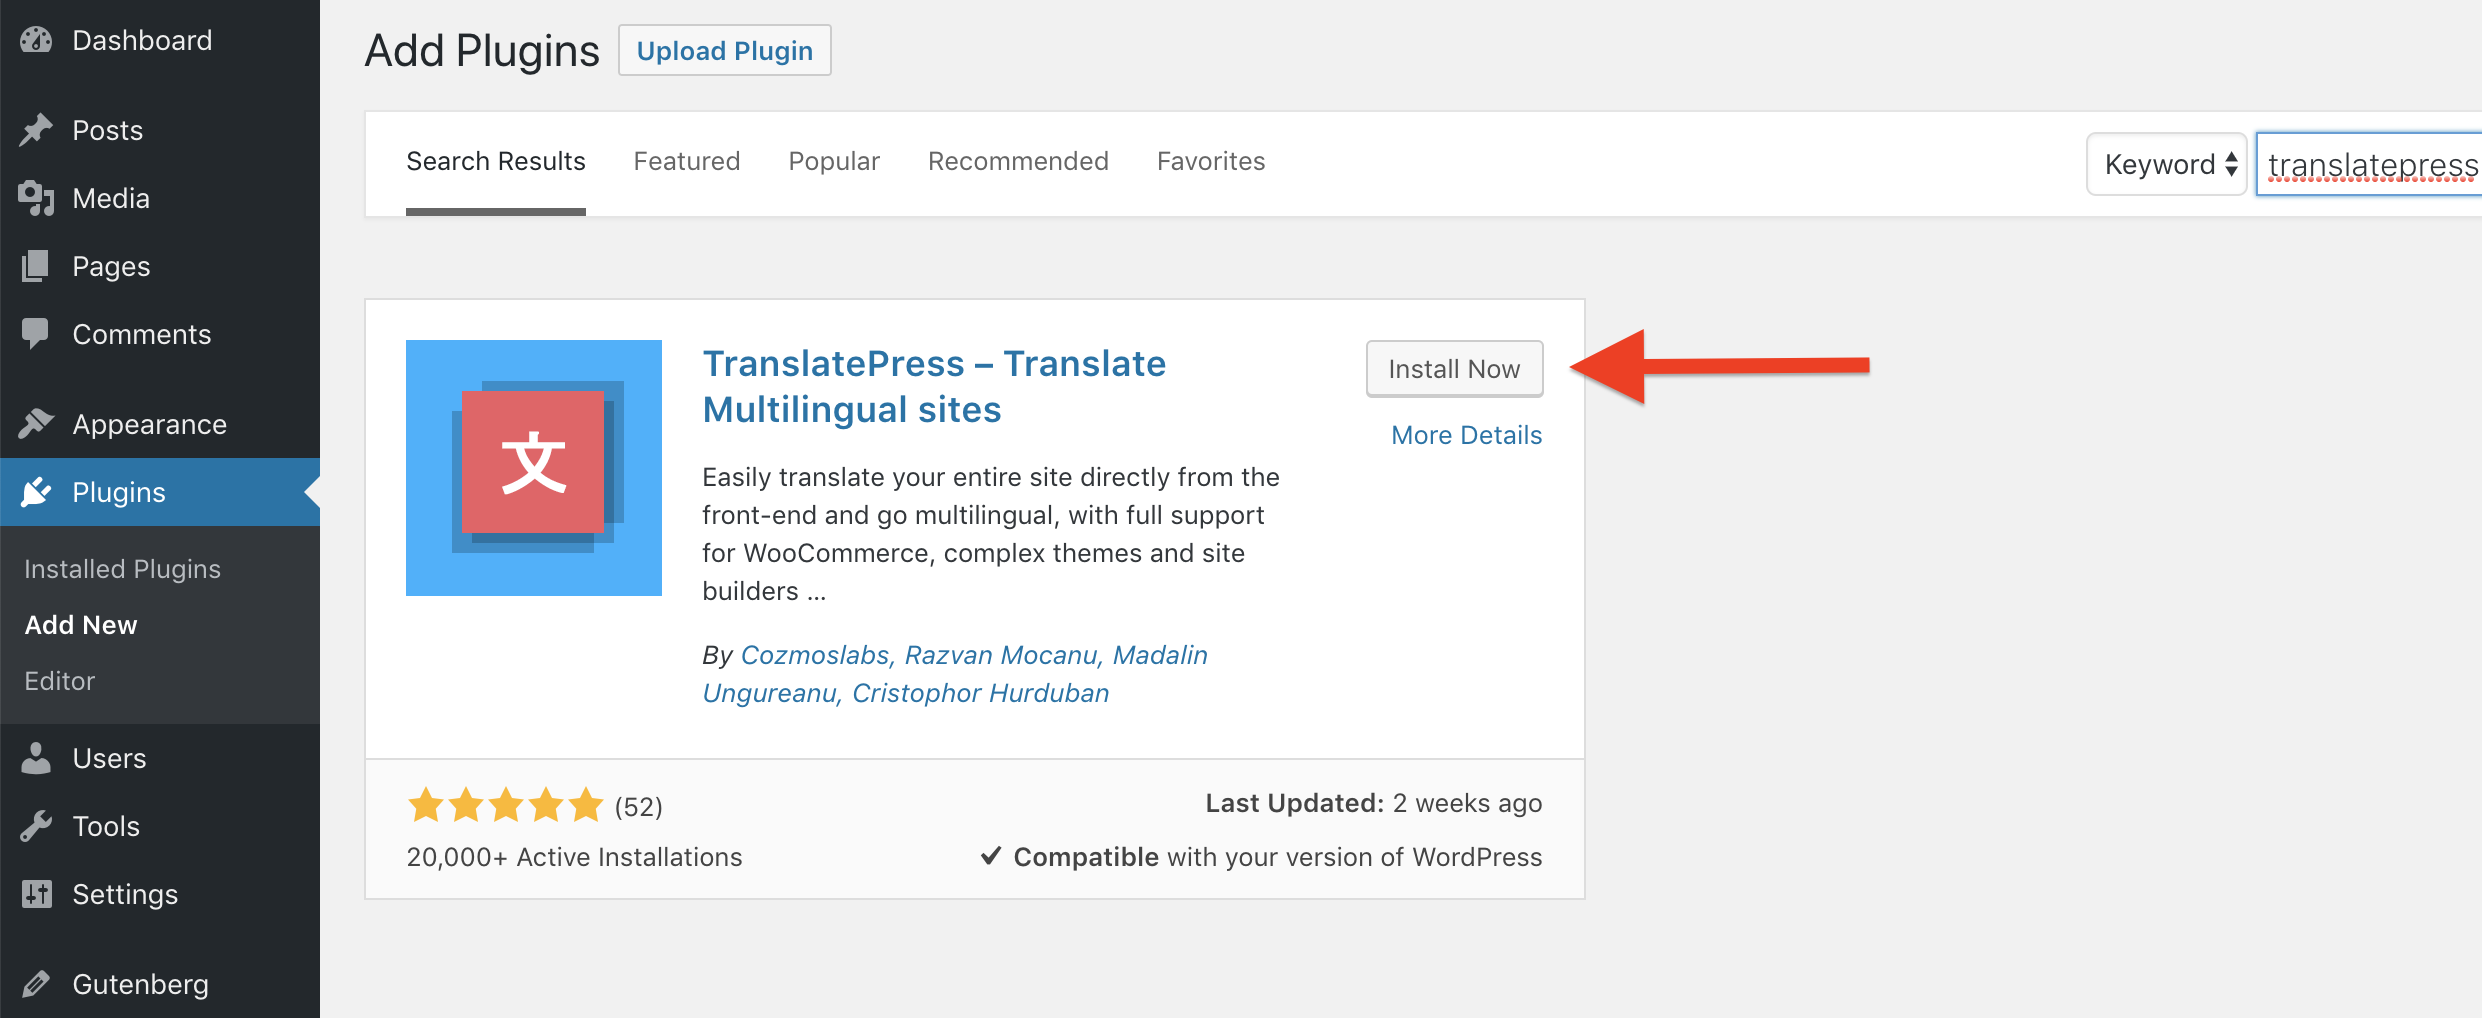
You can install TranslatePress by searching for it in the WordPress Dashboard > Plugins interface and installing it and activating it from there.
The setup process is straightforward:
- Add a second language from the plugin settings: I’m using Romanian
- Click Translate Site to start translating your site content, directly from the front-end
You can also access the translation interface from the top admin bar. Once opened, hover over strings in the right side and translate them one by one.
The blue icon strings are user-generated (like the page title or the content of a post), while green icon strings are gettext strings from your plugins and theme.
You can access the TranslatePress plugin settings in the administrator area in the menu under Settings > TranslatePress.
It can also be accessed both from the frontend and administrator area from the Admin Bar under the newly created button Translate Site, the Settings drop-down.
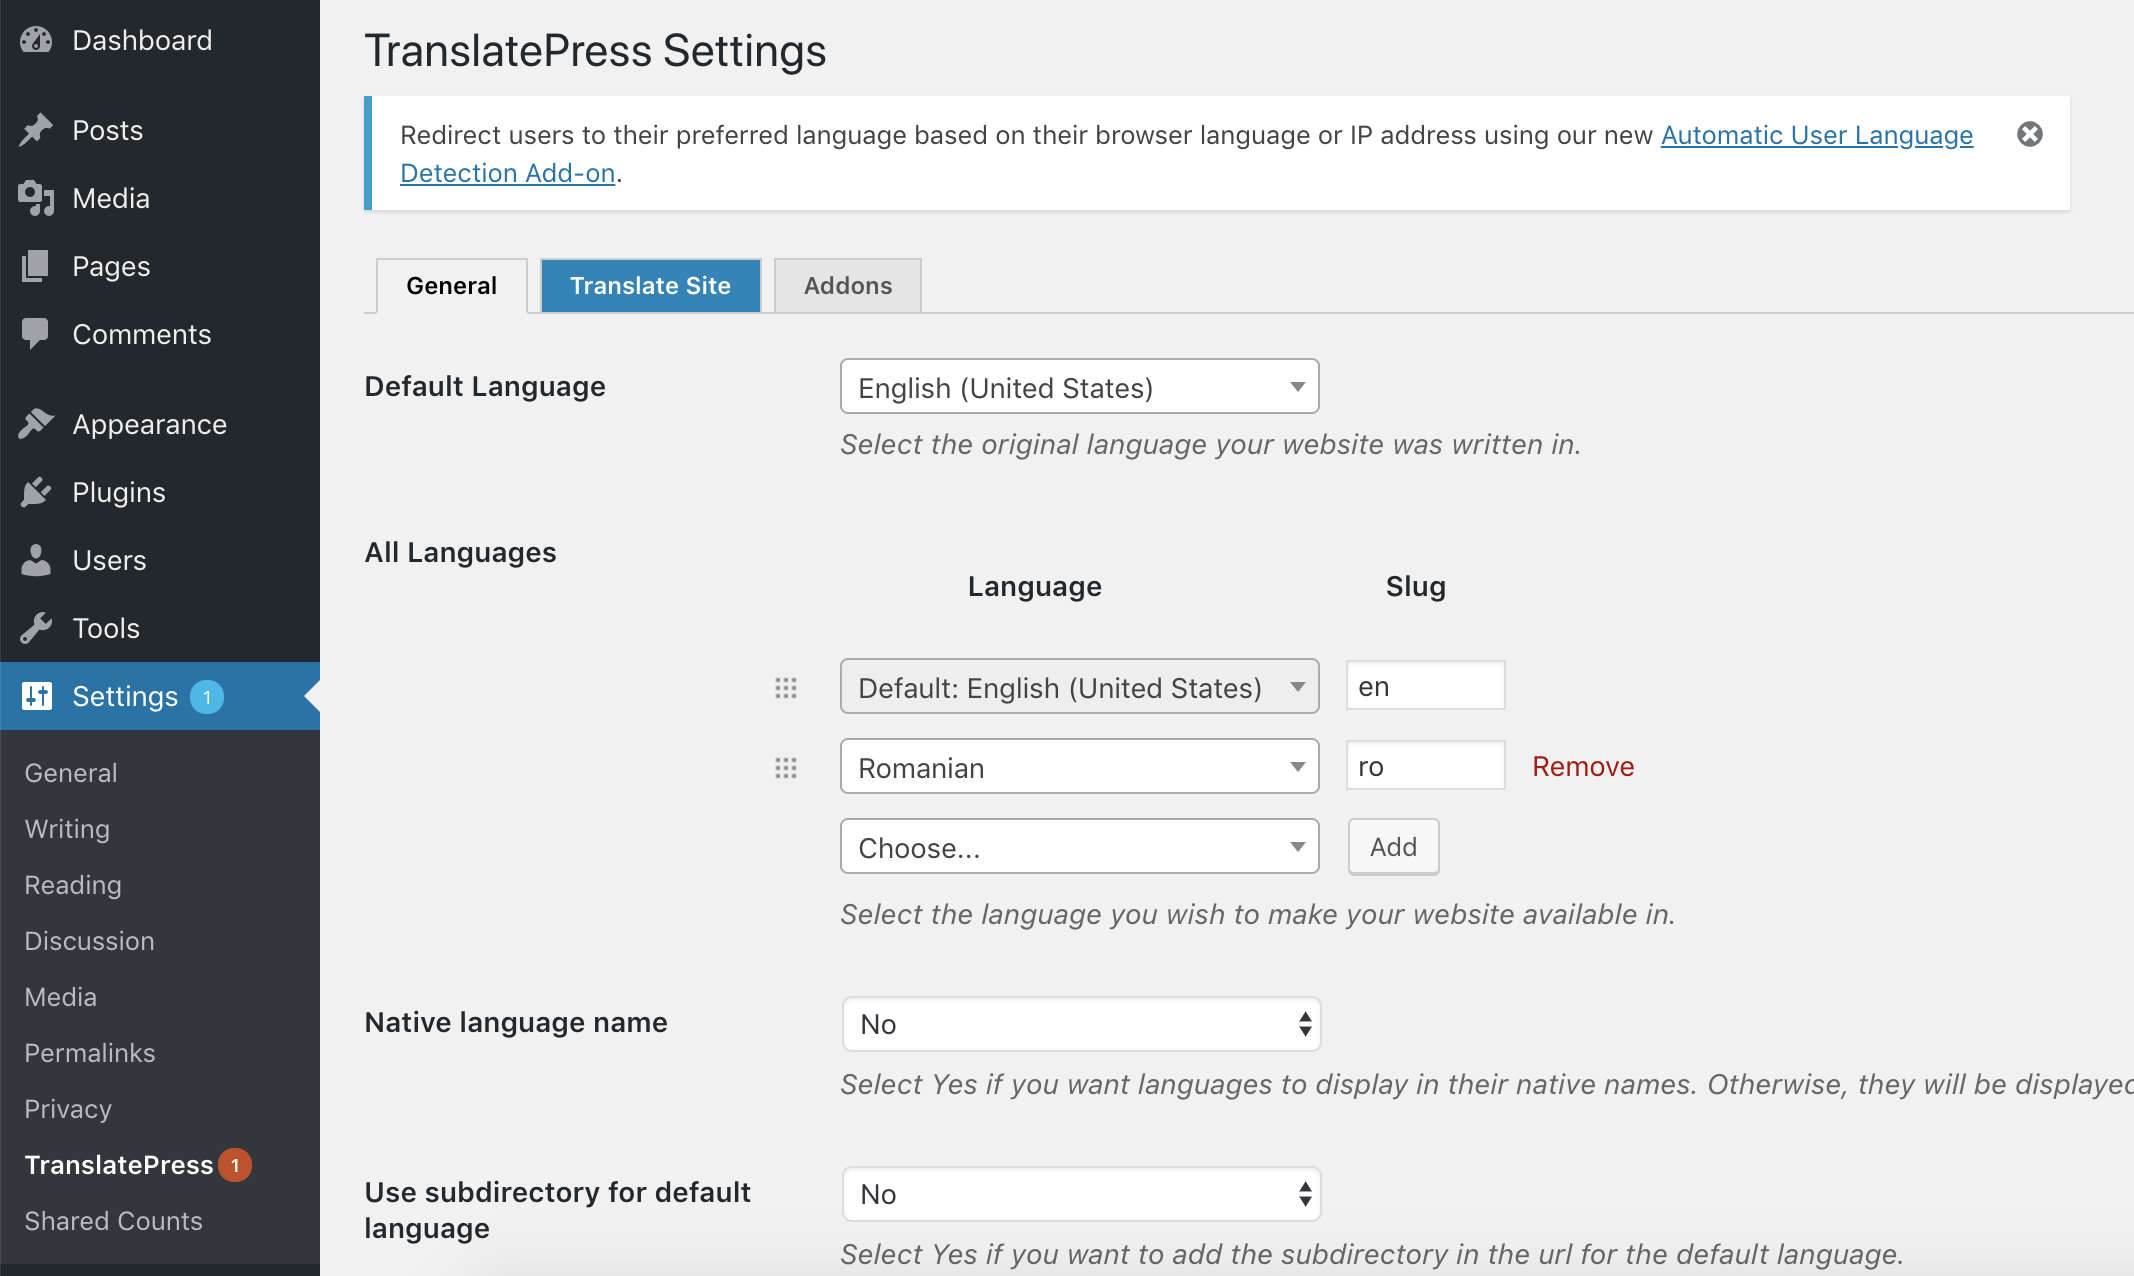
Set default language
You can select the original language from the drop-down on the plugin Settings page. By default, the language is inherited from the WordPress language that you can set up on install or change from Settings > General.
Set translation languages
You can select the languages in which you wish to translate your website. Select the language from the drop-down and click the Add button then Save Changes.
Actions you can perform on the languages:
- edit the slug of the language that will appear in the URLs of the site from the Slug input
- make the language active for the visitors of the site or only available for translation for the administrator by checking or unchecking the Activate checkbox (only in the PRO Version)
- remove the language by clicking the Remove link (this will not delete the existing translations from your database)
- rearrange the order of the languages with the drag-drop interface. This will determine the order in the language switcher floater and shortcode.
Display languages in their native names
Select Yes if you want languages to display in their native names. Otherwise, they will be displayed in English.
Use subdirectory for the default language
Select Yes if you want to add the language slug in the URL for the default language. For example, www.myhomepage.com/en/ instead of www.myhomepage.com when visitors are viewing the site on its default language (EN).
Instead of directing the user to a predefined language, you can also redirect them to their language using the Automatic Detection of User Language add-on.
Force language in custom links
Select Yes if you want to force custom links without language encoding to add the language slug in the URL for the default language.
Google Translate
Enable or disable the automatic translation of the site with Google Translate. Existing translations will be not be affected.
Note: Not all languages support automatic translation. You should consult the supported languages list.
Google Translate API Key
Here you can enter the Google Translate API key. Visit this link to see how you can set up an API key.
Language Switcher
You have three options to display language switchers on the site:
- Shortcode (Use the [language-switcher] shortcode on any page or widget.)
- Menu item (Go to Appearance > Menus to add Language Switcher Languages in any menu.)
- Floating language selection (Have a floating dropdown following the user on every page.)
For all the available language switchers you have the following options:
- Flags with Full Language Names (default)
- Full Language Names
- Short Language Names
- Flags with Short Language Names
- Only Flags
Translating has never been easier
That’s what I like about this plugin, you can translate directly on the page, and it’s so intuitive that any previous skills are not required. TranslatePress integrates itself into your existing theme settings, so not only you won’t have to change anything to use it, but there should be no conflicts with anything you’re already using.
TranslatePress is also integrated with the popular Google Translate, and all you’ll need is a Google API key.
Paid add-ons
The plugin has a freemium model, you get the plugin for free and you can buy some premium add-ons:
- SEO pack
- Multiple Languages Addon – Support for 221 languages Editorial Control
- Translator Accounts Addon – Create or
allow existing users to translate the site without admin rights. - Browse As User Role Addon – View content that is visible to a particular user role.
- Navigation Based on Language Addon – Configure different menu items for different languages.
- Automatic User Language Detection – Redirect visitors to their language preference
Pricing
The detailed pricing table with everything that each tier provides can be found on the official website.
Leave a Reply